Awesome Screenshot is a free browser extension available for popular browsers like Chrome, Firefox, and Safari which helps you to capture images and add Annotations like blurring sensitive info, adding titles, creating custom shapes for your blog.
You can create an arrow, write text, create a circle, etc and save a screenshot for personal records or share with friends through Facebook, Gmail, Twitter in Free Plan. The paid plan allows you to use advanced annotations like steps, callout and connect to services like Slack, Asana, Trello, GitHub, Jira and record video longer than 30 seconds.
Features,
- Capture or clip selected area, or all visible portion, or the entire page, Supports PNG format
- Supports horizontal scrolling when capturing
- Desktop screen capture
- Annotate any image with rectangles, circles, arrows, lines, and text
- Crop, scroll & show crop area dimensions
- Blur certain sections to hide sensitive information
- Copy the screenshot and paste it into Gmail, Facebook, Twitter, etc. Supports Windows and Linux
- Save to local
- One-click to upload to awesomescreenshot.com and get a shareable link
- Support Google Drive (Gdrive)
- Save very large images, bypass the 2M limit. No more crashes
- Interact with point-specific comments between friends and colleagues
Install Awesome Screenshot
There is no need to download an awesome screenshot as the respective browser takes care of the download and installation of the extension.
For Chrome Browser,
Open Google Chrome Store. Click this Extension link in the Chrome browser. Click Add to Chrome at the upper right-hand top. Chrome downloads and install the Awesome Screenshot extension in the background.
Video with detailed installation instructions.
For Firefox Browser,
Open Firefox. Click this Add-on to open the Firefox add-on page. Click Add to Firefox. Firefox downloads and installs the Awesome Screenshot add-ons in the background.
Video with detailed installation instructions.
This creates a small button (App Launcher) on the upper right-hand side browser as shown below. Just click that icon to launch Awesome Screenshot. When you click on the apps launcher you can see the popup window as shown below. This is a toolbar with all available options.
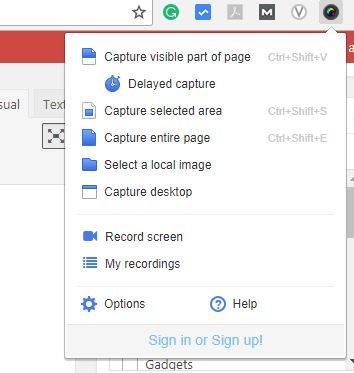
Options open the settings page for Awesome Screenshot where you can change capture preferences, saving preferences.
Use Awesome Screenshot to Capture Images
Awesome Screenshot is very easy to use the extension. The learning curve is less. You can use it efficiently within an hour of learning. In general, just click to open the toolbar and select the menu to perform respective actions.
This is the way you can use the Awesome Screenshot extension,
- Open Extension
- Capture image
- Annotate image
First, let’s see the different available options to capture the image and later how to annotate it.
This is the first step before starting to annotate the image. You need to capture an image that you want to use. Below are the different options available in Awesome Screenshot to capture images.
1. Capture Visible Part of Page
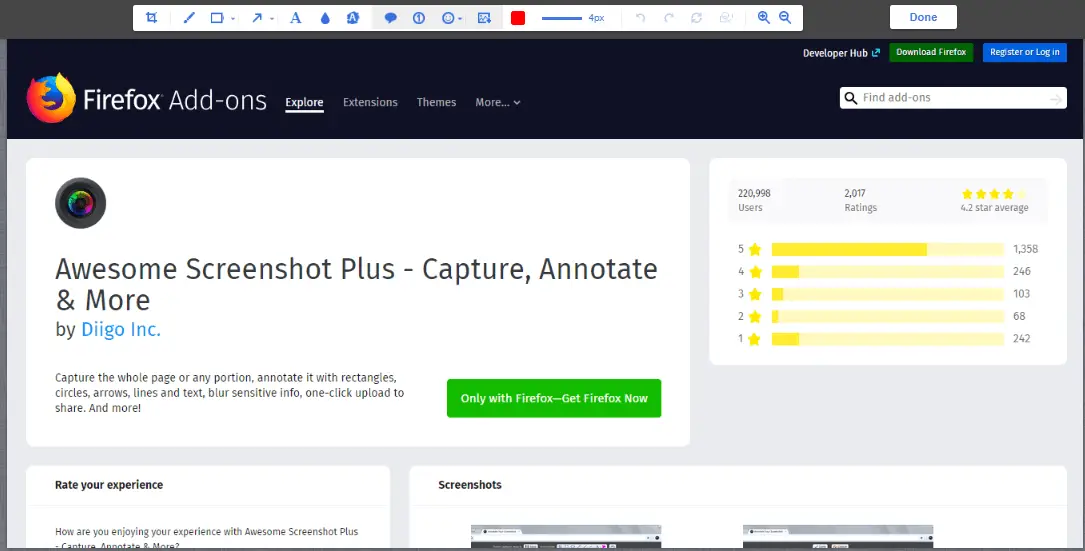
Use this option to capture the entire visible area of the browser. Just open the browser and launch the page you want to capture. Launch the extension and select this option. The tool captures the visible part of the page and opens in a separate window. This separate window has a toolbar that you can use to add the annotation.
2. Capture Selected Area
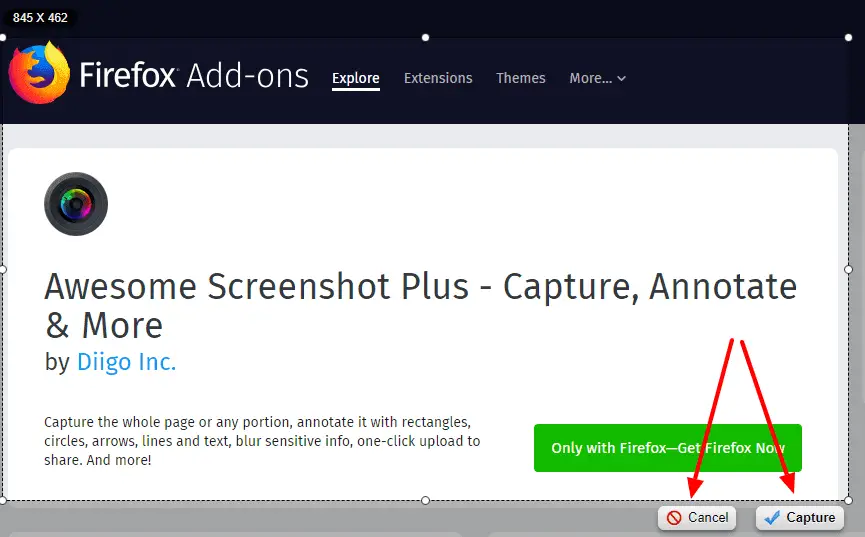
This option provides a cross-hair that you can use the select the required area and click on the Capture button. This helps to capture a part small part of the active window.
3. Capture Entire page
It actually captures the entire page web page. When I say entire, it is a complete web page and not just the only visible portion. This image could be very large vertically if the web page is bigger.
4. Select a local image
This allows you to select the image file on your desktop. It opens a browse window. Just locate and select the file to open it. You can also use the Drag and Drop feature.
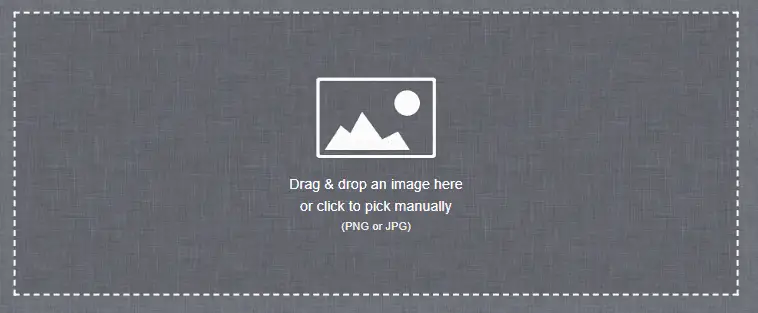
5. Capture Desktop
You can use this to capture the entire desktop or choose any running application.
Capture the entire screen.
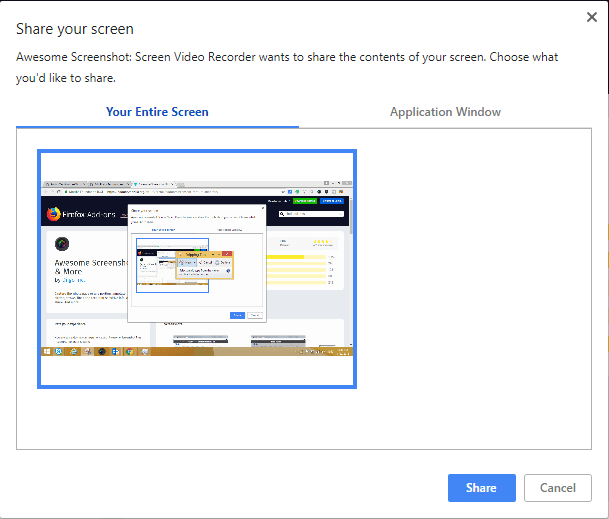
Application Window
Record Video using Awesome Screenshot
Awesome screenshot allows you to record Entire Desktop, any running application, or Chrome Tab. In the free version, you can record videos up to 30 sec for the longer duration video upgrade to the paid version.
Just open the App and select the Record Screen option to open the screen recorder window( Shown below).
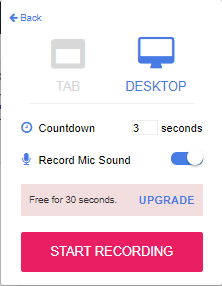
There are two options here.
- TAB – select to record the tab.
- DESKTOP – select to record the entire desktop or any running application.
- Countdown – controls when recording should starts. The default is 3 sec, that means recording will start after 3 seconds. You can change it.
- Record Mic Sound – Sider to control if you want to record Mic or not.
Record Desktop
Launch the App and select Record Screen. Select the Desktop icon to record the Desktop and click Start Recording Button. This opens a popup where you can select if you want to record the entire desktop or any application. Choose appropriate in this case Entire Desktop.
Recording starts after a delay of specified seconds. You can actually see the counter on the address bar. Click on the App Launcher icon to see the program and control option.
You can pause the video or stop by using the respective button. As soon as the recording is complete. A separate window opens as shown below showing details of the Video like size, etc. You can directly upload the video from here to Youtube or Google Drive or download In WebM format.
Below is one of video recorded using Awesome Screenshot.
Where does Awesome Screenshot store all recordings?
Open the app and select the My Recordings option. This opens all the recorded videos in a separate window as shown below.

Here you can manage all the recordings. You can delete all recordings by Clicking Delete All button. If you want to delete a single, just move the mouse over the individual recording thumbnail. It shows the delete icon at the right-hand top corner. Click it to delete the selected recording.
You can select the recording to open the upload page.
Note: these videos are temporarily saved under My Recordings and might be lost due to unexpected system or browser errors. We suggest you upload them to YouTube or Google Drive or download them to local to avoid any possible data loss.
Annotate Image using Awesome Screenshot
Awesome Screenshot provides free annotations like arrows, lines, blur, add text, add rectangle/circle, highlighting, pen while callout, steps, Imoji/Sticker, Image are paid. You need to upgrade to the paid version which costs 2$ to 20$ per month.
Refer to this link for complete pricing and available features with each plan.
Below are the generic steps to add annotation,
- Open Chrome
- Launch Awesome Screenshot extension
- Capture an image or select a local image
- Use available annotation
- When finished click the Done button
- Download image to localhost or upload to cloud

1. Resize image
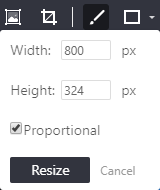
Follow the below step to resize the image.
Capture or select a local image. Click on the resize menu to open the below window. Enter required Width or Height. Make sure to select the proportional checkbox, this changes respective width, and height when either is changes, else your image will be skewed. Click Resize.
2. Crop image
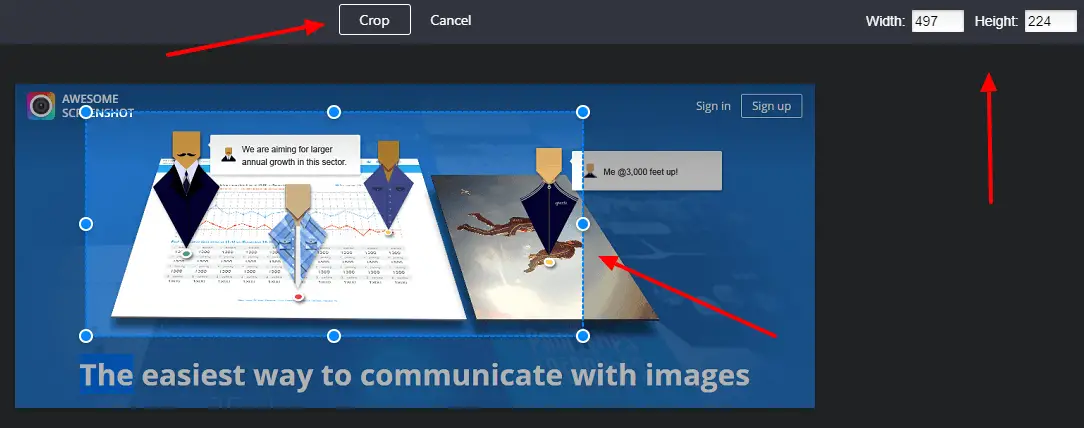
Follow the below step to crop the image.
Capture or select a local image. Click on the Crop menu. This opens the hairline. Select the required portion. You can also enter Width and Height as shown below. Clock Crop button.
3. Adding Arrows, Rectangle, and Text
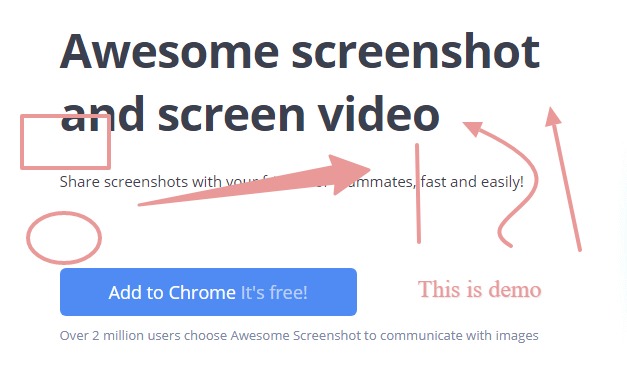
Select the image and click on the Arrow Annotation toolbar. Draw the arrow by selecting the starting and ending positions. You have different options like straight Arrow, Curved Arrows. You can also change the width of the line using the line width option.
4. Pen and Highlight
You can use a pan to draw any custom shape and highlight to highlight any portion of the image
5. Blur Portion
Blur hide some portion of the image. You can use this to hide sensitive or identifying information. This is the way you can do it.
Select the image and click on the blur toolbar. Drag it up to the selected portion to hide it.
Similarly, you can explore text, Adding shape annotation.
6. Callout, Image, Steps, Emoji
This control allows you to add callout, image, steps and emoji as shown below. These are not free, you need to upgrade to a paid plan.
7. Change annotation color and line width
These controls allow you to change the color of annotation and shape. You can choose diffent color and width for the annotation.
8. Zoom in and out
Zoom in and out zooms the image
9. Undo, Redo, Clear All, Delete
Use these control to undo, redo changes and delete as well.
10. Done
Click this button on the right-hand top corner when you are done. This finishes and open another dashboard as shown below.
Dashboard
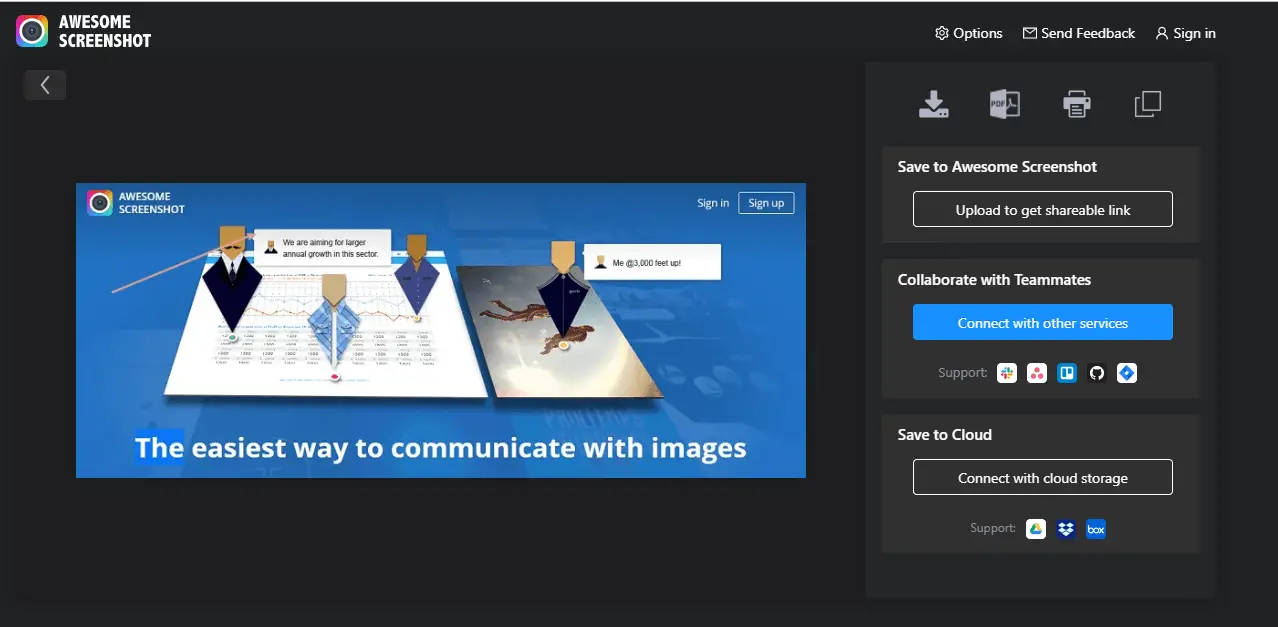
This provides below option,
Publish
Download as Image opens a Save as a window where you can browse and save the file in Jpg or PNg format. Download as PDF downloads the image in PDF format. Print opens the standard Print Window where you select the printer and print the image. Copy copies the image to the system clipboard.
Save to Awesome Screenshot allows you to upload the image to the Awesome Screenshot website and get a shareable link.
Collaborate with Teammates allows you to connect to Slack, Jira, Asana, Github, Trello, and share images. Just connect the respective service and use it.
Save to Cloud is available only to the pro user only. You need to upgrade to a paid plan. Here, you can connect to cloud storage and save images. It supports Google Drive, DropBox, and Box services.
Summary
The awesome screenshot is a free browser extension to capture the image and add basic annotation and editing, but the advanced annotations like callouts, steps are paid one which costs around 2 to 20$.
Someone who simply wants to use it for annotation may find it costly, but within 2 $ you are getting a complete suite which is very useful for a blogger like us.
