This article explains how to use the XAMPP control panel to start/stop, administer/ configure services like Apache, MYSQL, FileZilla, Mercury, Tomcat with just a click of a button.
Before moving further, let’s discuss XAMPP in Brief.
XAMPP
XAMPP (Cross-Platform, Apache, MariaDB, PHP, and Perl) is one of the most popular web development environments. It provides an easy-to-install package that allows developers to set up a local server environment with Apache, MySQL (MariaDB), PHP, and other modules.
The XAMPP Control Panel (v3.2.2) is a user-friendly interface that allows you to start/stop, administer, and configure services with a simple click. This article explains how to use the XAMPP Control Panel to manage services like:
- Apache (HTTP Server)
- MySQL (MariaDB)
- FileZilla (FTP Server)
- Mercury (Mail Server)
- Tomcat (Java Servlet Container)
XAMPP Control Panel
XAMPP Control panel (v3.2.2) is a plain, simple interface for XAMPP which helps you to Start/Stop, Administer and configure services like Apache, MYSQL, FileZilla, Mercury, Tomcat. You can also change ports, monitor services, start shell, view logs, etc.
The interface is simple. There is a module list along with Start, Admin, Config, and Logs button along with advanced control options on the right-hand side.
Below is the default XAMPP dashboard.
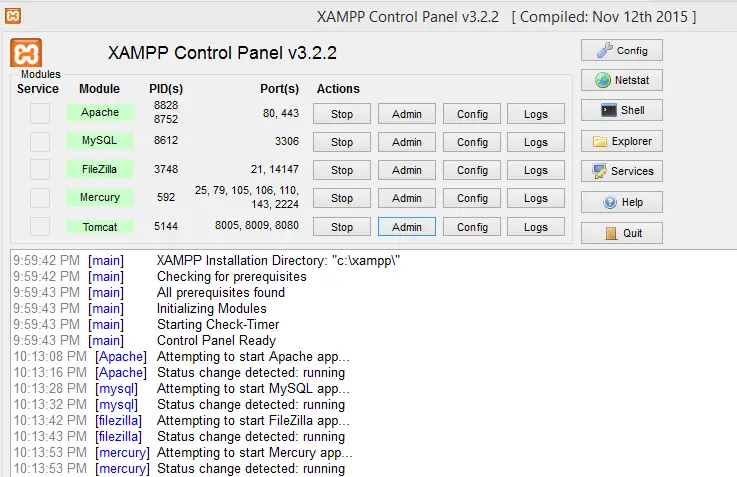
The functionality of different control buttons.
- Start – Use this button to Start and Stop the respective module/service.
- Admin – Use this button to open the admin or application console for the respective module.
- Config – User this button to open configuration files like httpd.conf, my.ini, mercuri.ini
- Logs – Using this button to open log file like access.log, error.log
How to use XAMPP Control Panel
Go to Start and search for XAMPP and select the XAMPP Control panel to start it in Windows.
Now, click the start button for the respective module/service to start the service. As soon as you click Start Button, the module background turns green, and Ports, PIDs get populated. This means service is started successfully. The caption of the button changes to Stop. Use the same button to stop service.
XAMPP also shows the log (Check image) like,
Attempting to start Apache app…
Status change detected: running.
Sample Log below
12:03:09 PM [main] Initializing Control Panel
12:03:09 PM [main] Windows Version: Windows 8.1 Enterprise 64-bit
12:03:09 PM [main] XAMPP Version: 5.6.28
12:03:09 PM [main] Control Panel Version: 3.2.2 [ Compiled: Nov 12th 2015 ]
12:03:09 PM [main] You are not running with administrator rights! This will work for
12:03:09 PM [main] most application stuff but whenever you do something with services
12:03:09 PM [main] there will be a security dialogue or things will break! So think
12:03:09 PM [main] about running this application with administrator rights!
12:03:09 PM [main] XAMPP Installation Directory: "c:\xampp\"
12:03:09 PM [main] Checking for prerequisites
12:03:11 PM [main] All prerequisites found
12:03:11 PM [main] Initializing Modules
12:03:11 PM [main] Starting Check-Timer
12:03:11 PM [main] Control Panel Ready
12:03:13 PM [Apache] Attempting to start Apache app...
12:03:13 PM [Apache] Status change detected: running
12:03:14 PM [mysql] Attempting to start MySQL app...
12:03:22 PM [mysql] Status change detected: running
The log also shows an error message in case the respective service is not started. You can use the log to understand errors and debug.
1. Manage Apache Module
Apache(httpd) is cross-platform HTTP, open-source Server. It is available for operating systems including UNIX and Windows. It is a secure, efficient, and extensible server that provides HTTP services as per current HTTP standards.
This section covers how to start/stop, configure and view logs for Apache Module.
Admin
Click the Admin button to open a dashboard as shown below. Use this interface to open Applications, PhpInfo, and PhpMyAdmin module. The links are at the right-hand top right corner( see the image below).
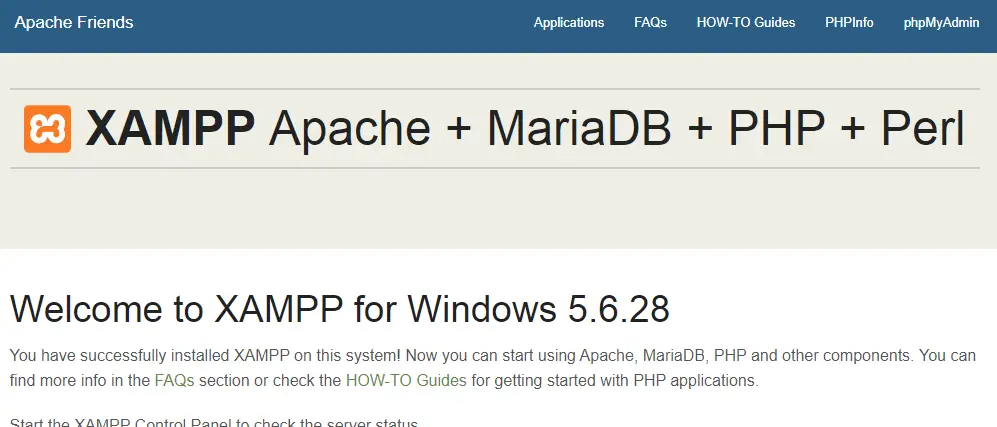
- Applications – It shows a list of all applications installed and links to access those. You can install different applications like WordPress, Joomla, and Moodle. Here it shows the information of the app with a clickable link to open it.
- FAQ – This is a frequently asked question section. This section has some common questions and answers.
- How-to Guides – This is the how-to guide section. It has good documents that show how to use XAMPP.
- PHPInfo – This shows information like PHP version, Apache configuration, and environment, etc
- phpMyAdmin – This is a control panel for phpMyAdmin. It helps in administrating MySQL. You can create a database, table, users, query database.
Config
This option allows you to modify the configuration of the Apache module. Just click the Config button and it opens a popup showing list of all configuration files.
Click the Individual file to open and edit it.
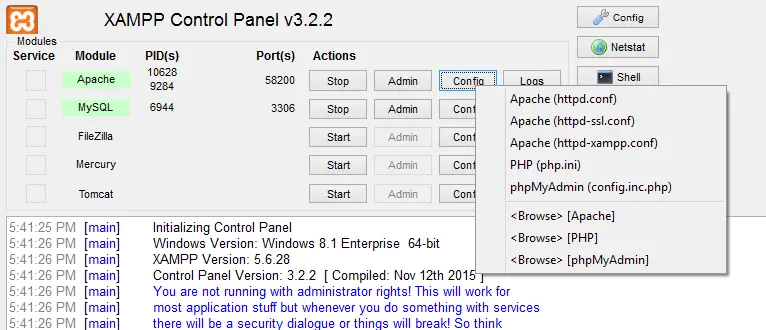
List of the available config file,
- Apache (httpd.conf) – This is the main Apache HTTP server configuration file. It contains the configuration directives that give the server its instructions.
- Apache (httpd-ssl.conf) – This is the Apache server configuration file providing SSL support. It contains the configuration directives to instruct the server on how to serve pages over an HTTPS connection.
- Apache (httpd-xampp.conf) – This is the XAMPP Setting file.
- PHP (php.ini) – PHP’s initialization file, generally called php.ini, is responsible for configuring many of the aspects of PHP’s behavior.
- phpMyAdmin (config.inc.php) – This is needed for cookie-based authentication to encrypt the password in the * cookie.
There are some <Browse> commands which actually open the respective file location in separate windows explorer.
How to change the configuration?
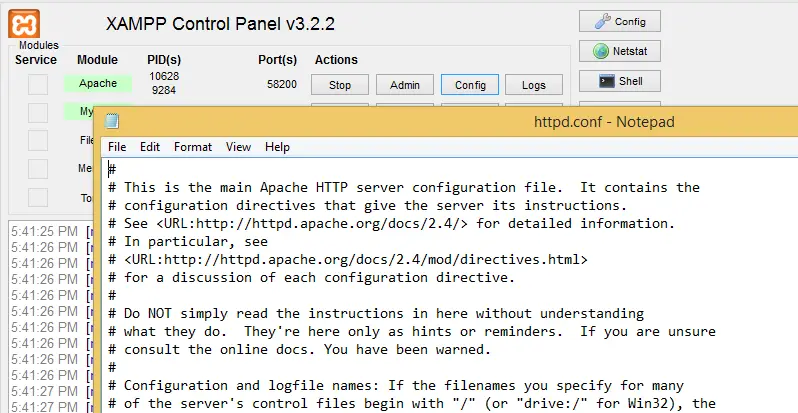
- Click the button to open the config file.
- Modify and save it.
- Restart the respective service to make sure changes are reflected.
Logs
This section list links to all log files. Click on the button to see a list of the available log files for the Apache module. Refer to this file if you face any issues with the respective service.
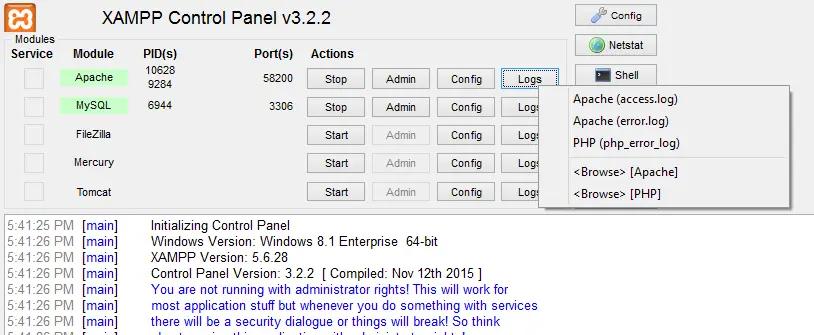
List of the available log file for Apache,
- Apache (access.log)
- Apache (error.log)
- Php (php_error_log)
2. Manage MySQL Module
MySQL is an open-source relational database management system. This covers MySQL options. XAMPP now comes with MariaDB instead of MySQL. Nothing changes for the end-user as MariaDB is an enhanced, drop-in replacement for MySQL and is available under the terms of the GPL v2 license
Admin
This opens a phpMyAdmin dashboard as explained above. This is the graphical interface to work with the MariaDB database. You can query, update, delete from the database using it.
Note: Don’t modify anything unless you understand what you are doing.
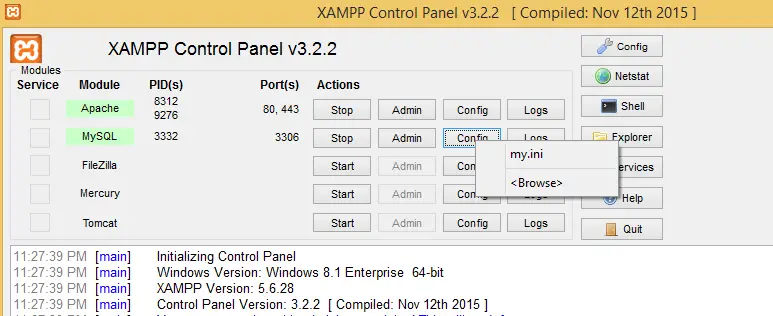
Config
This opens the my.ini control file for MariaDB Module. Use this control file to modify different parameters like port, memory setup for MariaDB Service.
3. Manage FileZilla
XAMPP comes with FTP client FileZilla. This is a free, and open-source FTP client available for Windows, Mac, Linux, and other operating systems. Refer to this article to install FileZilla on Ubuntu Linux Distribution.
This section covers those options to manage the FileZilla module.
Admin
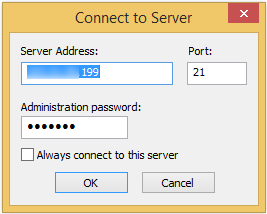
Click the Admin button to open the Connect to Server box as shown below. Enter Server Address(IP Address) and Administration Password and Port(Defaulted from the config file) to connect to the remote system.
Click the OK button.
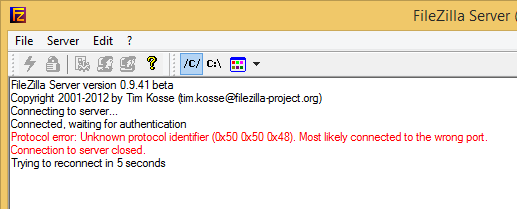
This should open the below interface using which you can transfer files to the remote system.
Config
This opens the FileZilla Server.xml configuration file where you can change the default port. Below is the sample file.
<FileZillaServer>
    <Settings>
        <Item name="Admin port" type="numeric">14147</Item>
    </Settings>
</FileZillaServer>
Logs
This opens the FileZilla log file.
4. Manage Mercury – mail server
Mercury Mail Transport System (Mercury MTS) is a mail server. It is feature-rich, extremely standards-compliant, supports all major Internet mail-related protocols. It is complex to install as a standalone server, but XAMPP comes with easy to use and maintain Mercury Server.
This section covers those options to manage the Mercury module.
Admin
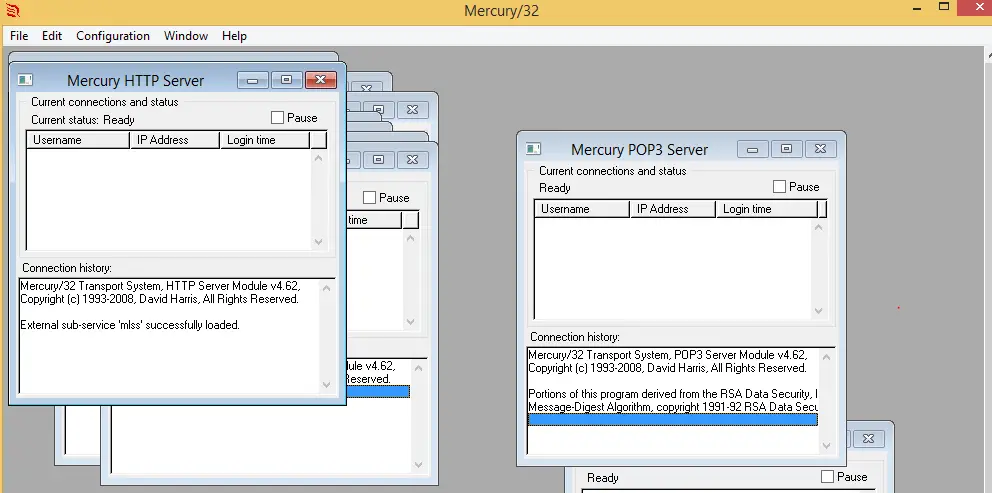
This open Mercury control panel for HTTP, POP3, PopPass, IMAP4, PH, Finger Server as shown below.
Config
This opens the mercury.ini configuration file. This file contains all setup information like protocol supported, localhost information, Delivery failure notification template, Delivery confirmation template, Mail Delivery Queue, etc.
Logs
This opens the logs file for mercury.
5. Manage Tomcat
Apache Tomcat often referred to as Tomcat Server, is an open-source Java Servlet Container developed by the Apache Software Foundation. It is an open-source implementation of the Java Servlet, JavaServer Pages, Java Expression Language, and Java WebSocket technologies.
This section covers those options to manage the Tomcat module.
Admin
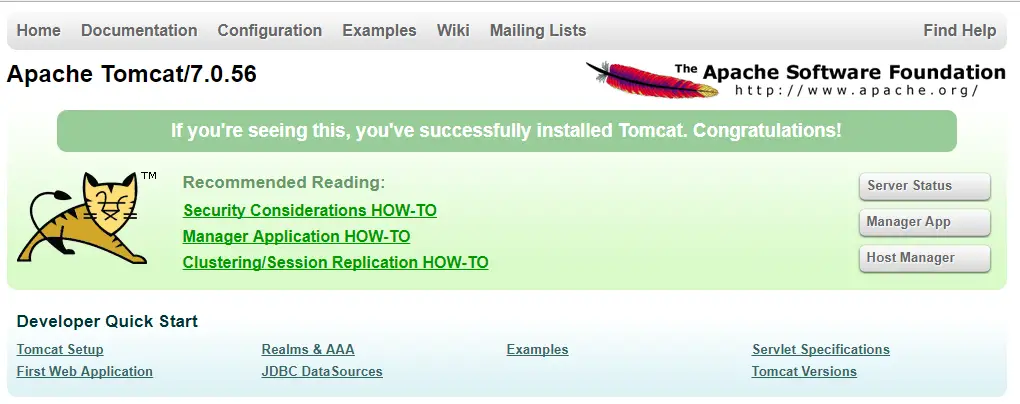
This should open the Tomcat control panel as shown below.
Config
Use this button to open the Tomcat configuration file.
List of the configuration file,
- server.xml
- tomcat-users.xml
- web.xml
- context.xml
Logs
Use this button to browse the log file.
As a normal user, you only work on the basic control operation mentioned above. Only change the below option if you face any issue with XAMPP.
XAMPP Advance Control Option
The toolbar on the right-hand side is for the advanced user to troubleshoot any issues with XAMPP. Don’t change any default setup, unless it is not working.
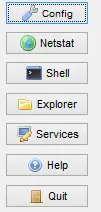
These controls open some advanced options which are self-explanatory.
Config
It opens the advanced configuration panel like this.
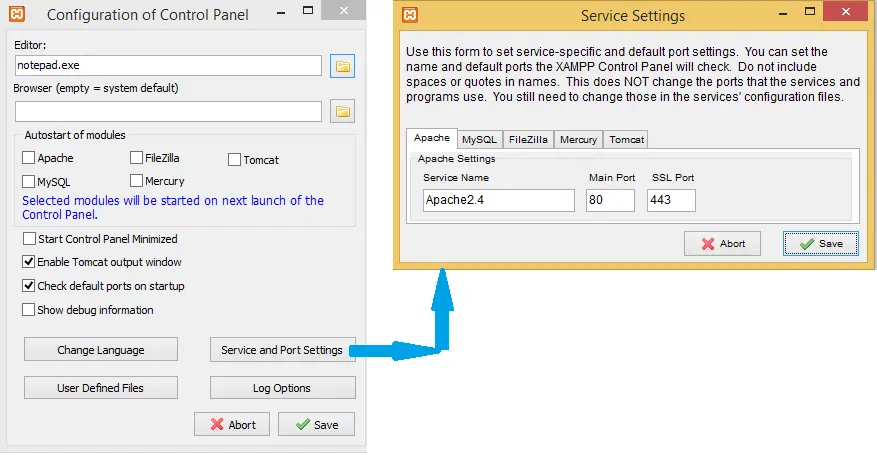
You can use this control to set,
- Editor – default is Notepad. You can change to any other preferred text editor like Notepad++, TextPad, etc. Just click on Browse and select the required editor.
- Browser – default browser to use. Empty means, it uses windows default. You can change it if you like to use a different browser like chrome, Firefox, safari, etc. Click on browse and select the required.
- AutoStart of modules – You need to explicitly click on the start button to start the service. Specify the service which you want to start automatically as soon as XAMPP starts.
- Change Language – Use to select the language. English and German option is available.
- User-Defined Files – Use it to specify user define control and log file for the modules.
- Log Options – This allows you to change log file font and font size. The default font is Arial with size 10.
- Service and Port Setting –
- Each service uses the default port e.g. Apache on port 80. More than one service cannot run on the same port. If you have some other server running and port 80 is not available you can change it here. Make sure to restart the service.
Netstat – Displays active TCP connections, ports on which the computer is listening.
Shell – Start XAMPP on MS-DOS mode
Explore – Open windows explorer
Service – Open windows services panel
Help – Reference to help document
Quit – Quit XAMPP
Summary
I hope you have a better understanding of the control panel and how to work with different modules.
Please share and subscribe if you liked the article.
Thanks for Visiting the Blog.